Translation Management
- Creating a Translation Project
- Creating a Client Quote
- Staffing a Translation Project with the Freelance Module
- Staffing a Translation Project without the Freelance Module
- Executing a Translation Project
- Translation Project Closing and Invoicing
For Spanish speakers our [partner-itexponent|partner IT Exponent]] created a series of videos explaining the life cycle of a translation project:
- Part 1: http://www.youtube.com/watch?v=9mQUEnpfS_Y
- Part 2: http://www.youtube.com/watch?v=JzNlhwkLtyY
- Part 3: http://www.youtube.com/watch?v=OlRT4Jqtvf4
- Part 4: http://www.youtube.com/watch?v=qkHvMGE98bE
Creating a Translation Project
Input
- Project details gathered during the Sales step.
- If present, purchase order sent by the client containing project specification. Some customers call it ''Work Specification''.
Output
- New project generated in the system.
Creating a translation project
1. Click on the Projects tab in the Main Menu.
2. Click on the “Add New Project” link in the Admin Projects box.
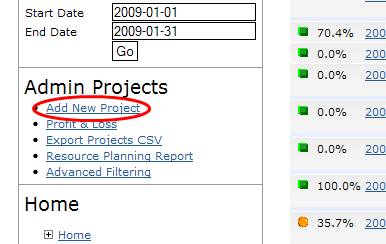
As a result you get transferred to a page where you need to define the Project Type:
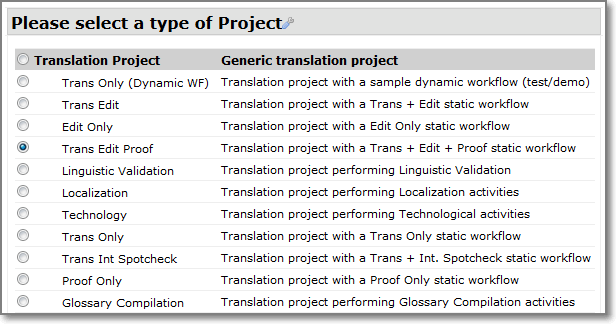
3. As a next step you need to provide the Project Details.
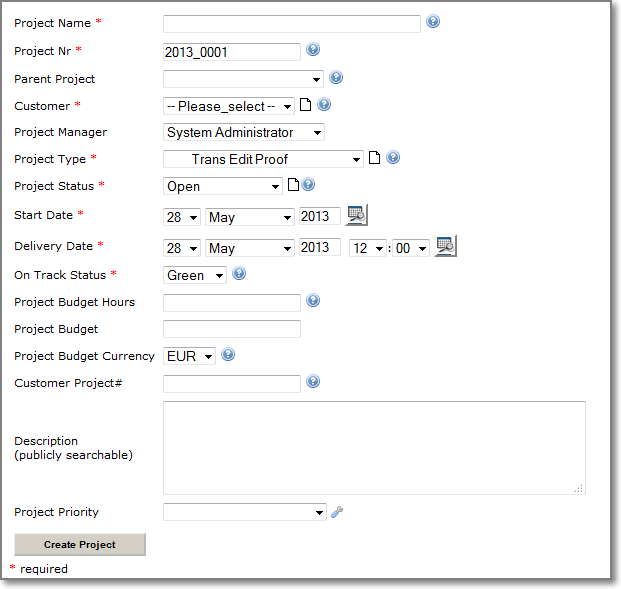
Choose an appropriate project name, describing the project purpose in 3-10 words. The value for the Project Name field should not contain the customer name, the type of service, the customer reference number or any other detail that is handled separately by other fields. If possible, use the document title, or the main document title, if the project includes several documents. If the project does not have a title, you may use the file name without extension or special characters (eg: 1234_abc-def.doc = 1234 abc def) or the e-mail subject.
4. Fill in a unique Project Number. A default Project Number is generated by the system, consisting of the current year plus the project count for this year. The format of the project number is normally YYYY_nnnn (4-digit year ''underscore'' 4-digit counter)
5. Select a Parent Project (not required). In case you are creating a subproject, you can select here the Parent Project related to it. The drop-down box lets you choose from the list of potential and open projects in your system.
6. Choose a Client from the list of active clients. Please notify your system administrator if your project client does not appear. [You can define a new customer on the fly if it does not exist yet. The page icon leads you to the Client Creation Page if you have the permission to access customer. The drop-down box only shows "active" clients.] Potential clients and clients in other presales states are not shown. You may want to go to the clients section to change the status of your client.
7. Choose a project manager from the list of project managers. It is set by default with the name of the person who is creating the project, but it can be changed or left blank.
8. Choose a project type (required). The drop-down box lets you choose from the list of possible project types according to your system configuration. Please choose Other and notify your system administrator if the desired project type does not appear.
9. Choose a Project Status. Leave the default status Open if you want to start with the project. Choose Potential (or any of its subcategories accordingly) if the project has not started yet.
10. Choose Start Date and Delivery Date.
11. Choose On Track Status.
12. Choose Percent Completed (not required). This field will update automatically during the course of the project.
13. Fill in Project Budget Hours (not required).
14. Fill in Project Budget (not required).
15. Choose Project Budget Currency (not required).
16. Fill in the Customer Project# If your customer has a reference for this project, please type it here. It will appear on financial documents.
17. Fill in the Description. This is a free-text fields that is accessible for all employees in your company. This text will be indexed and appear in the search results.
18. Choose a Confirm Date
19. Click the Create Project button. As a result you get transferred to the Project Details form.
Entering translation project details
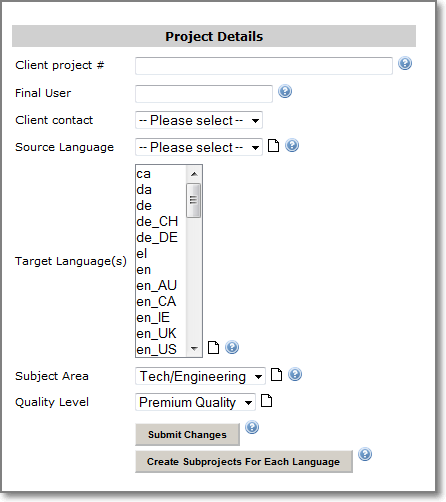
0. Fill in the Customer Project# (not required). This field can be used to store your client's project number as defined in the previous screen. The content will appear in the project invoices as a reference for your customers.
1. Fill in the Final User (not required). This field is used in the case that the project's customer is not the final customer.
2. Select a Client Contact (not required). Identifies a person from the project’s client who is responsible for this project.
3. Select the Source Language (required). Please select the source language of your project. This field is used during the generation of translation tasks and during invoicing. If you have the Freelance Module installed, this field is used to select a list of possible translators.
4. Select the Target Language(s) (required): Please select one or more target languages. The language codes follow ISO conventions, consisting of a two-letter language ID in lower case, followed by a two-letter country ID in upper case. If the regional variant is not relevant, please use only the two-letter UPPERCASE code. To select more then one target language for a project, on Windows systems, please hold the Ctrl key pressed while clicking on the desired languages. There is no restriction in the number of target languages for a project. However, we recommend you to split large translation projects (>20 source files) into several subprojects with a single target language. If you have the Freelance Module installed, this field is used to select a list of possible translators. The source and target languages serve to create a directory structure for the project, depending on the Project Type.
5. Select a Subject Area (required). This field is used during the generation of translation tasks and during invoicing. If you have the Freelance Module installed, this field is used to select a list of possible translators.
6. Select a Quality Level (required). This field is used in the Translation Quality Module to determine the target translation quality and during invoicing.
7a. Click on the Submit Changes and Create Folder Structure button if you want to create a simple folder structure inside the project's filestorage.
7b. Click on the Submit Changes and Create Language Subprojects button if you want to generate a separate subproject for each target language you selected.
Uploading Translation Project Files
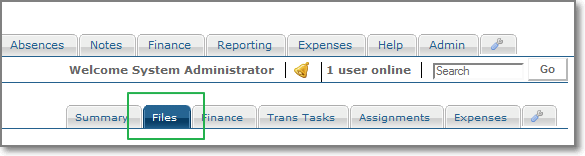
1. Having entered the project details, you should now see the Projects Main Page. Click on the Files tab in the right menu to upload your files.
2. Click on the 0_source folder.
3. Click on the green plus (+) icon.
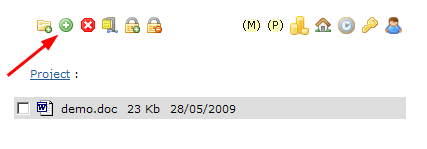
4. Click the Browse... button and select the source document you want to upload.
5. Click Submit and Upload.
6. Click the Return to Previous Page link and repeat from step 4 for all the other files.
Creating Translation Tasks
1. Click on the Trans Tasks tab in the right menu.
2a. In case you have performed a Translation Memory analysis of the source files, please click the Browse... button in the Add New Tasks From a Translation Memory Analysis box, select the corresponding CSV file and click the Add Wordcount button. You can select if the analysis applies to one or all target languages.

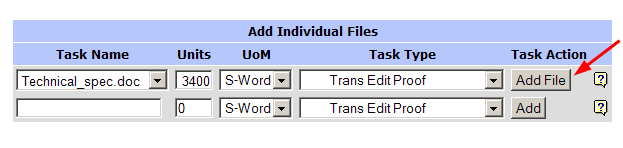
2b. If you do not have a CSV file, please select the corresponding file name from the drop-down menu and fill in the Units, select the suitable unit of measure (UoM) and Task Type and click Add File.
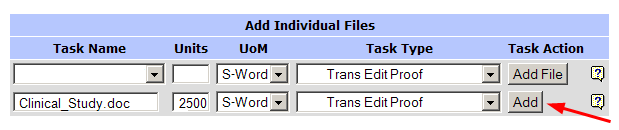
2c. If you want to insert a translation task from scratch which does not involve directly a file located in the 0_source folder, please fill in the Task Name, Units, select the suitable UoM and Task Type and click Add.
Following an example of the task list:
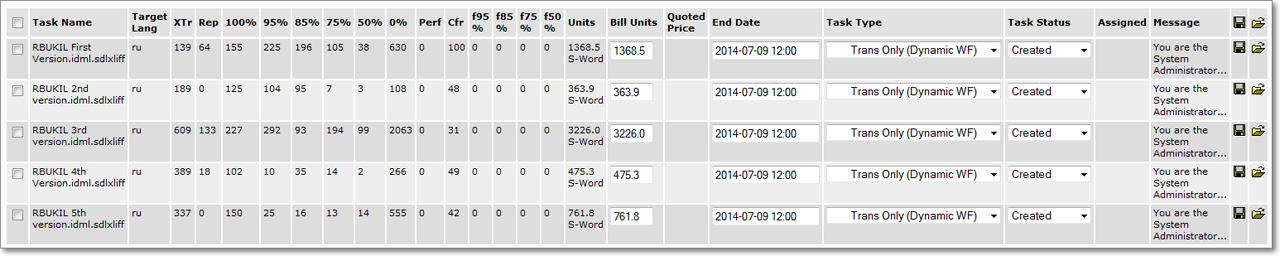
Agenda:
| Field
|
Description
|
XML Element Trados 9.0 |
| Task Name
|
Name of the task, taken from the wordcount file, usually file name
|
|
| Target Lang
|
Target Language defined in "Translation Project"
|
|
| XTr | X-Translated text:
These are 100% matches that also share the same “context”, which is the previous and the following sentence. |
<inContextExact>
|
| Rep | These are repeated sentences inside the same document |
|
| 100% | These are sentences that are identical to sentences in the translation memory. |
|
| 95% | 95% Matches |
|
| 85% | 85% Matches |
|
| 75% | 75% Matches |
|
| 50% | 50% Matches |
|
| 0% | 0% Matches - These words are new |
|
| Perf
|
|
<perfect>
|
| Cfr
|
Cross File Repetitions
|
<crossFileRepeated>
|
| f95%
|
|
|
| f85%
|
|
|
| f75%
|
|
|
| f50
|
|
|
| Units
|
|
|
| Billable Units
|
|
|
Creating a Client Quote
Input
- Translation tasks set while creating the project. → Creating a translation project.
- Company rates and other financial details.
Output
- New quote generated in the system.
Creating a client quote
- Add another project to this quote.
- Edit the quote details.
- Preview the quote in HTML or PDF format.
- Manage the quote.
1. Click on the Finance tab in the menu on the right.
2. Click the New Quote from Translation Tasks link under the Customer Links on the right. This will start a wizard to create a new quote based on the data available to the system.
3. Deselect the projects you do not want to create a quote for and click the Select Projects for Invoice button.
4. Deselect the tasks you do not want to include in the quote, check the Aggregate tasks of the same type box if required and click the Select Tasks for Invoicing button.
5. In the next screen the system automatically provides a preview of the the financial document according to the system settings and Customer details. All the fields can be modified if required or filled in if they are missing. Please note that the Cost Center can be selected only in this screen and cannot be changed later.
6. When all the correct values are in place, click the Create Quote button to create the new Quote.
7. In the One Quote screen, it is possible to:
Staffing a Translation Project with the Freelance Module
Input
- Translation tasks set while creating the project. → Creating a translation project.
- Freelance rates and other financial details.
Output
- The project tasks are assigned to staff members.
Staffing a translation project
- Through the "Search for User" box
- Through Employee box (if you want to add one or several employees)
- Through the "freelance list Component"
- Through the "Translation Freelance List", which shows the same content as the previous one, but in a different order.
1. In the Summary tab, scroll down and locate the Project Members box.
2. Click the Add Member link.
3. In the next screen, you have four ways of selecting a project member:
4. Simply click on the radio button corresponding to the most suitable translator, in order to add him to the project. Then choose Full Member from the "Add As" drop-down menu, check the Notify box and finally click the Add button.
5. Revise and edit the e-mail message that will be sent to the translator (if required), check the Send me a copy box if you want to receive the same message in your inbox and click the Send Email button.
6. Repeat steps 1-5 for all desired project members.
7. Click the Assignments tab in the menu on the right and select the project member to assign to each task from the drop-down menus provided and click the Submit button.
8. If you want, you can use the Auto-assignment feature. Please note that this feature will add a single member to all tasks (so that it's not suitable for multilanguage projects). In order to do so, select the amount of words to assign to a member, select this member from the drop-down box and click the Auto Assign button.
9. The name of the member appears in the box below. Click Submit to confirm your choice.
10. Repeat steps 8-9 to assign another member to other tasks.
Staffing a Translation Project without the Freelance Module
Input
- Translation tasks set while creating the project. → Creating a translation project.
Output
- Project tasks assigned to project members.
Staffing a translation project
1. In the Summary tab, scroll down and locate the Project Members box.
2. Click the Add Member link.
3. In the next screen, search for the translator to assign to the project in the Search for User Component by entering either part of the e-mail address or part of the last name in the appropriate field, check the Notify box and click the Search button.
4. In the following page, select the desired translator and click the Select button.
5. Revise and edit the e-mail message that will be sent to the translator (if required), check the Send me a copy box if you want to receive the same message in your inbox and click the Send Email button.
6. Repeat steps 1-5 for all desired project members.
7. Click the Assignments tab in the menu on the right and select the project member to assign to each task from the drop-down menus provided and click the Submit button.
8. If you want, you can use the Auto-assignment feature. Please note that this feature will add a single member to all tasks (so that it's not suitable for multilanguage projects). In order to do so, select the amount of words to assign to a member, select this member from the drop-down box and click the Auto Assign button.
9. The name of the member appears in the box below. Click Submit to confirm your choice.
10. Repeat steps 8-9 to assign another member to other tasks.
Executing a Translation Project
Input
- Project tasks and assignments. → Creating a translation project.
Output
- Complete translation workflow.
Executing a translation project
1. Follow the link provided in the e-mail message, log into the system and click the desired project if necessary.
2. In the Summary tab, find the Project Freelance Tasks box or click the Trans Tasks tab.
3. Right-click the diskette icon next to each task and select Save Link As...
4. Select the local folder where you want to save the file and click the Save button to start downloading the file.
5. Repeat steps 3 and 4 in case of multiple tasks.
6. Once the task is completed, click the folder icon next to each task, browse and select the file to upload and click the Open button.
NOTE: Anything you type in the Comment field will be included in the e-mail notification to the Project Manager.
7. Check the Send a notification to your Project Manager box and click Submit and Upload.
Translation Project Closing and Invoicing
Input
- Complete translation workflow. → Executing a translation project.
Output
- Project invoice.
Closing and invoicing a translation project
- Add another project to this invoice.
- Edit the invoice details.
- Preview the invoice in HTML or PDF format.
- Manage the invoice.
- Delete the invoice.
1. Click the Files tab and locate the files to deliver to the client in the appropriate folder according to the project's workflow (Trans Only, Trans+Edit or Trans+Edit+Proof) and copy them to the 9_deliv folder.
2. Proceed to delivery following the project's specifications, e.g. attaching the files to an e-mail message addressed to the client's contact, or by granting access permissions to the 9_deliv folder.
3. In the Summary tab, click the Edit button and select Delivered from the Project Status drop-down menu
(NOTE: Make sure all of the project members have logged their hours in the system before closing the project, since it is not possible to log hours to closed projects).
4. Click the Finance tab and click New Customer Invoice from Quote. This will start a wizard to create a new invoice based on the quote that was created at the beginning of the project.
5. Select the appropriate quote(s) and click the Select Documents button.
6. In the next screen the system automatically provides a preview of the the financial document according to the system settings and Customer details. All the fields can be modified if required or filled in if they are missing. Please note that the Cost Center can be selected only in this screen and cannot be changed later.
7. When all the correct values are in place, click the Submit button to create the new invoice.
8. In the One Customer Invoice screen, it is possible to:
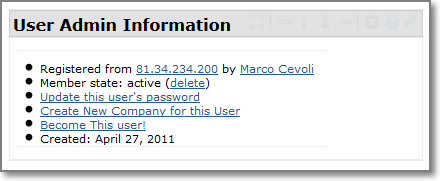
9. Create Bills from Purchase Orders in the same manner. Please note that in order to create a Bill, you first need to make sure that you have created a Company for that Freelancer.
The link can be found in the Freelancers Main Page, in Portlet "User Admin Information".
10. In the Summary tab, click the Edit button and select Invoiced from the Project Status drop-down menu.
Contact Us
Project Open Business Solutions S.L.
Calle Aprestadora 19, 12o-2a
08902 Hospitalet de Llobregat (Barcelona)
Spain
Tel Europe: +34 609 953 751
Tel US: +1 415 200 2465
Mail: info@project-open.com